
The Screen Printing Process
Do you want to learn more about the screen printing process here are Broken Arrow? Check out our step by step guide or watch our video and find out everything you need to know.
Watch our Screen Print Process
Overall, the t-shirt printing process should be quick, easy and painless. The process of screen printing has remained the same for over 100 years, but the technology has changed. From taping films on screens to printing the design directly on the screen via a computer to screen machine, the advances in the screen printing process have allowed us to provide a better product for the customer. How you ask? We can provide really consistent prints, highly registered designs and the same product time after time. Broken Arrow does simulated process screen printing on most customized t-shirts orders, which allows you to be saved money. Traditional 4 color process screen printing costs much more money and gives you no less of a result than the t-shirt printing simulated process Broken Arrow products. Contact us for more details about our screen print process.
Get Started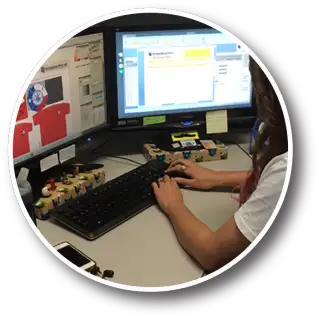
1. Creating Your Online Artwork Proof
First, the screen printing process starts with the artwork. At Broken Arrow, we can work with a design or logo if you have one, or you can have our artists create a custom design just for your order. You will get an online proof to review and approve so you can be sure everything is 100% perfect before your shirts are produced. Once you have approved your online proof, our production artists get everything setup to start production on the shirts. The production artists will separate the design into layers of colors, which will each get their own screen for printing. The colors are separated directly onto the mesh, and skips the older process of film positives. This allows for a much cleaner print, and less waste for the landfills.
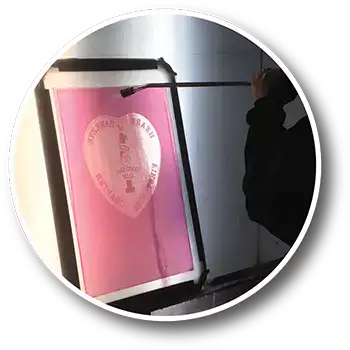
2. Prepare & Create the Screens
We take your color separated design and create one screen per color plus an additional screen for the “under base”, which will ensure your colors stay bright on dark garments. Think of a screen much like your screen at home on your windows. You can push small particles through it. To block areas that we don’t want ink to be applied to the t-shirt, we apply a special thing to the screen called emulsion. This blocks anything from being able to come through, including ink. We then use a special machine called a DTS (direct-to-screen) printing that takes your design and prints it directly on the screen. Once that is done, we expose the photo sensitive emulsion to light. This exposure process allows your designed to be “burned” into the screen. We rinse out the screen and viola – your screen is ready! We do this same process for each one of the colors in your design. Broken Arrow process an recycles roughly 150 screens per day during your t-shirt screen printing process.
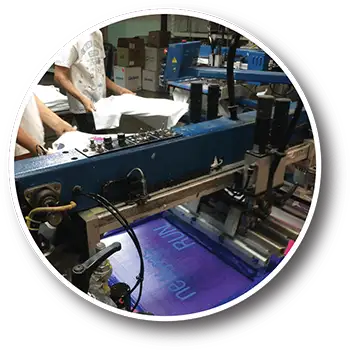
3. Setup the Screen Printing Press
During the next step in the screen printing process, each individual screen is located into the screen printing press. Then, the screen printer loads each screen with the appropriate ink colors. Once this is done, the screen printer does a test print to get a better idea of what equipment or screen adjustments need to be made to ensure the best possible screen print. The printer will make adjustments to ensure the screens are properly registered to each other – or that they properly align between colors. The printer will also adjust things like print order, squeegee angle, squeegee pressure and print speed. Once all of these adjustments are made and we’ve done test prints to ensure they are perfect, printing can begin. Then, the screen printer will begin to load the t-shirts on to the plat. They must be sure that each shirt is positioned properly and is straight so the print is in the correct spot on each shirt. Once the shirts are loaded, printing can begin.
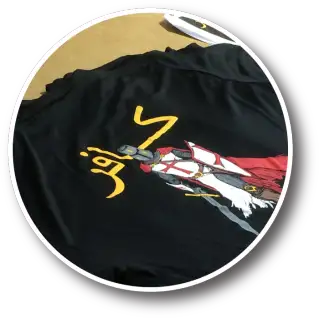
4. Print & Dry the Screen Prints
Depending on the needs of an individual order, we dry the under base ink prior to printing your colors over top. This is known as “flashing”. This ensures that once the ink is applied over top, it does not smudge and smear and distort your print. Once the entire shirt is printed, we run them through a 12-20 foot dryer at the correct temperature for you particular garments and ink used. The dryer looks much like a pizza oven, but it is definitely not. Drying is a vital point in the process. The purpose of drying the ink is to cure it, which ensures it sticks to your shirt. Under curing the ink can cause it to wash and flake off, but over curing it can cause sublimation, meaning the garment blends too much with the ink and changes the ink color. Broken Arrow tests each dryer 4 times a day to ensure proper drying temps at all times.
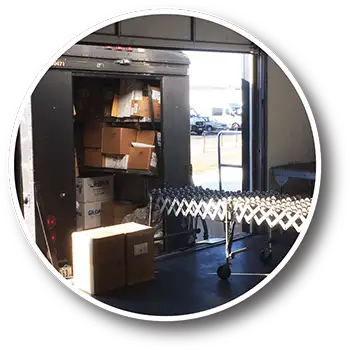
5. Quality Control Process & Shipping
After going through the dryer, the shirts are reviewed by our quality control department. A quality control technician has the very important job of reviewing each and every shirt to make sure the print looks perfect, and also matches the proof that was approved. They will review the garments to check for manufacturer flaws as well, such as small stains or holes. Once the items have passed the quality control inspection, they proceed to our shipping department which packages them up to be shipped out, or picked up at our Des Moines showroom. Oh, and did we mention this whole screen printing process is complete within 4 business days after you approve your proof? It's true! So you'll have your fantastic custom printed apparel FAST!